Agenda
Unit 0
Day One - Mon. Feb. 5
Course Intro -
Why take this course?
Why study graphic arts?
8 Celebrities Who You Never Knew Were Graphic Artists
Course Outline
- Logon,the Network - OEN
- Signing in using Chrome - [email protected]
- Classroom rule - Computers and BYOD Instructional Use ONLY
- Find the course website: mssalvo.weebly.com
- Passwords & Privacy
- Complete the introduction survey Course Questionnaire
Agenda Unit 1 - Animation
U0-A1-About-Me - Free Online PhotoEditor (Use At Home and At School)
U0-A2-What-I-Know
UO-A3-FileManagement
UO-A4-Principles-Of-Animation
UO-A5-Download-Storyboard-Template
-------------------------------------
Week One - Lesson One - February 4th - February 8th
Learning Goals - I will be able to use Adobe Animate to create digital illustrations and export in different file formats.
I will know that I am success if my digital illustrations and animations are able to meet the following criteria:
Success Criteria - Click here for the checklist.
TGJ3O students who created the sailboat, you will create the Coffee Cup Banner
Adobe Animate Basics
Feb 11- U1-A1-Sailboat Tutorial PDF - Sailboat tutorial - Student Ex1 Ex2 Ex3 - Flash Animation Rubric
Feb 12 -U1-A2-Watch Boat Video 2 - Adding-Waves-To-Boat-Tutorial-
Week Two February 19th - February 22
U1-A3-Adding-Sounds-To-Boat-Animation
U1-A4-Animating-Boat-Through-Waves - visit Freesounds.org for sound effects
U1-A5-Background-And-Sky-to-Boat-Animation (Gradients)
U1-A6-Sun-Animation
U1-A7-Bird-Movie-Clip
U1-A8-Bird-Guide-Animation
Week Two
U1-A9- Be My Valentine Assignment -
Video 1 - Create A Heart In Flash
Feb 19 Video 2 - Create A Bee Movie Clip
Feb 20 Video 3 - Create a Motion Guide For Bee to Follow - Be My Valentine Julien's Example - Be My Valentine GIF
Feb 21 Video 4 - Animating Text - Communication Technology Banner
Level Two - How To Draw Character - Flash Tutorial - For further inspiration: How to Draw Flat Designer Adobe Illustrator
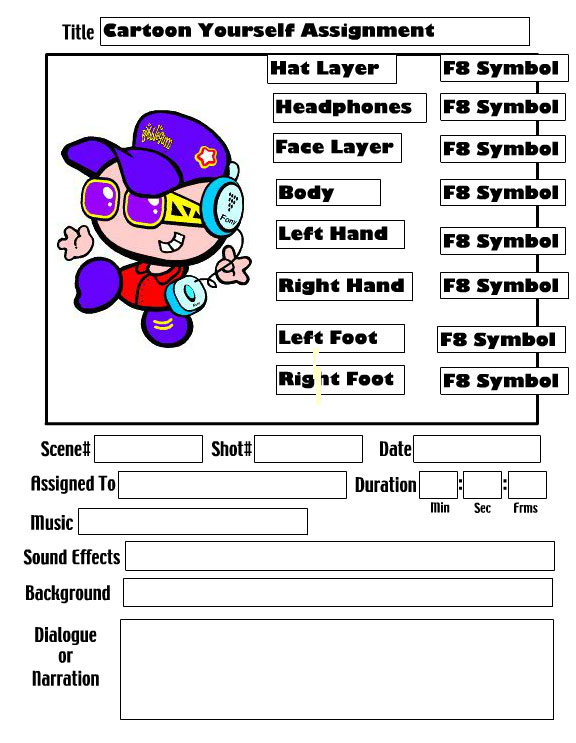
Assignment Cartoon Yourself
Create A Storyboard Of Your Kid Self As A Cartoon
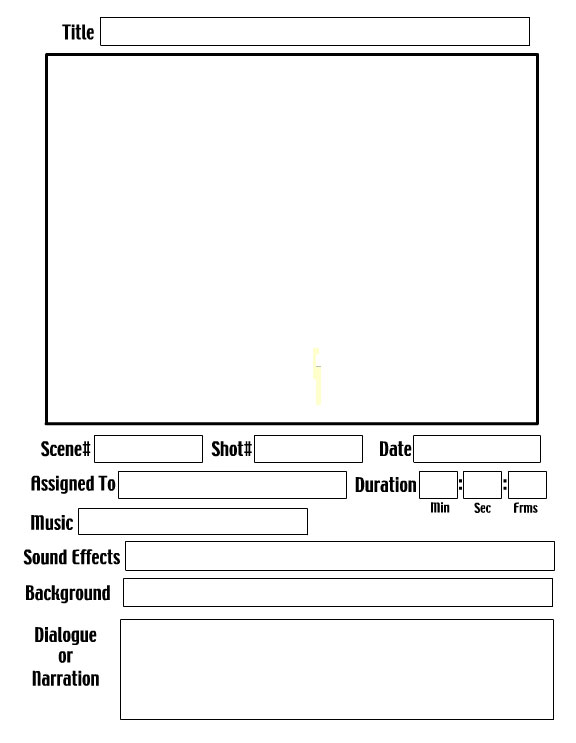
You will need to draw the blank storyboard of what your Animation will do.
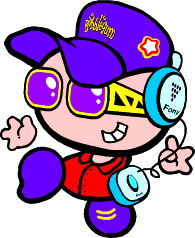
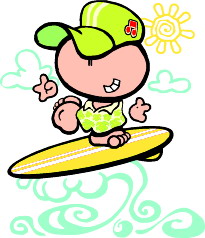
Here is Julian's Bunny Bubble Gum Character and here is Andrew's Bubble Gum character.
Bubble Gum Kid 1 - Bubble Gum Kid 2 - Bubble Gum Kids 3
You can get inspiration from the following Bubblegum kids.
Rubric For Unit One Animations - Sailboat, Bee Movie, Cartoon Self, Moon Animation
For more ADOBE ANIMATE/ FLASH Tutorials you can view the following COMM TECH Class.
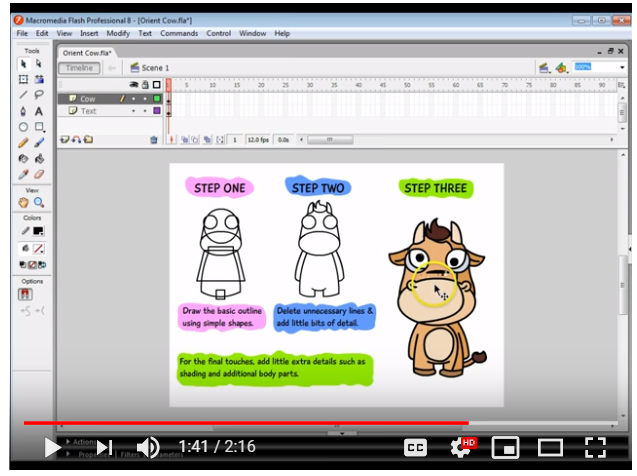
Week Three - Drawing Techniques, MCCow (Movie Clip), MC Cloud)
Feb 26 - U1-A12-Drawing Techniques - Cow
Feb 27 - U1-A13-Movie-Clip-Cow - See Ms. Salvo's Cow with wagging Tail and Blinking Eyes
Feb 28 - U1-A14-Movie-Clip-Shape-Tween-Cow-Jumped-Over-Moon
March 1 - Upload All Files To Unit 1 Google Site For Progress Report - Sailboat, Be Movie, Cartoon Self, Cow Over Moon
Students in TGJ3O who completed TGJ2O - You will create a halloween scene.
Please see below. Here is Julian's starter file but he did not do the flying witch (Part II). Here is Annie's version of Halloween.
U1-A10-Bat-Animation (Movie Clip)
U1-A11-Flying-Witch (Motion Guide)
Week Four -
Organizing Different Shots with Scenes - Action Script 3, Scene 1 - Day Scene Cow - Scene 2 - Night Scene Over Moon
You will need to TRACE the following image for your walk cycle - Frame-by-Frame Animation
U1-A11 - Animating a looping background Part I
U1-A12-Animating a looping background Part 2
All files need to be uploaded to Portfolio Google Website As An Animated GIF in Unit 1
- sailboat
- Be My Valentine
- Bee Movie
- Cow Over Moon (Day and Night Scenes)
- Animated Background
- Cartoon Self
Week 5
Test #1 - Wed Mar 20th Adobe Animate - Study Using Quizlet - Show Ms. Salvo Your Results -
Monday March 5 - Walk-Cycle-Webber - You will need to download a Walk Cycle Graphic For Background
U1-A13-Walk Cycle Pt 1 - Upload Webber The Duck Walking Across Stage To Your Portfolio
U1-A14- Walk Cycle Pt - Bone Tool - Animate Your Character (Nested Symbol) With Different Poses
Test - Wednesday -Thursday - Friday (March 20th - March 22).
Test 1 Rubric - Test1 Animation File - Animation Movie - Animation Movie Complete
Rubric Unit One
Week 6
Storyboard - Multiple Scenes - Beginning Middle End
U1-A16-Graffiti Text - Click here to generate your TAG line in a font generator. Click here for the SPRAY CAN image.
Culminating Adobe Animate
Here are the 4 scenes you will need to draw with a focus on what happens to Webber or Cartoon Self due to pollution.
Get Inspired with Julians' startup file on the impact of Acid Rain.
U1-A17 - Thurs. March 28 -Rain Cloud Animation Pt 1
U1-A18- Fri. March 29 - Rain Cloud Animation Pt 2
Ms. Salvo's Sample Lighting And Rain Scene 2
April 1 - Complete Webber 3 Scene Animation Upload to Portfolio Website
U1-A19 April 2 - Blinking Character
U1-A20 April 3 -Drawing A Body with Animated Bone Tool
U1-A21-April 4 - Mouth Synch
U1-A22- April 1 -Animating Text with Motion Presets
Review
U1-A19- A. Walk Cycle-Frame-By-Frame-Animation
B. Walk Cycle Tutorial - Stick Figure
U1-A20-Bone-Tool-The-Flash - Rigging A Character Part I
U1-A21-The-Flash-Walk-Cycle - Part II
Additional Flash Assignment
Complete the following videos and upload the FLASH projects to your portfolio
1. How to create an simple animated slideshow
Creating An Animated Banner In Animate
2. How to create a growing animation using a MASK
3. How to create glowing animated text
4. How to create faded text
5. How to create an interactive button
Week 7 - April 8 - April 11
Introduction to Photoshop
Unit 2 - Digital Imaging using Photoshop (Upload All Files Portfolio)
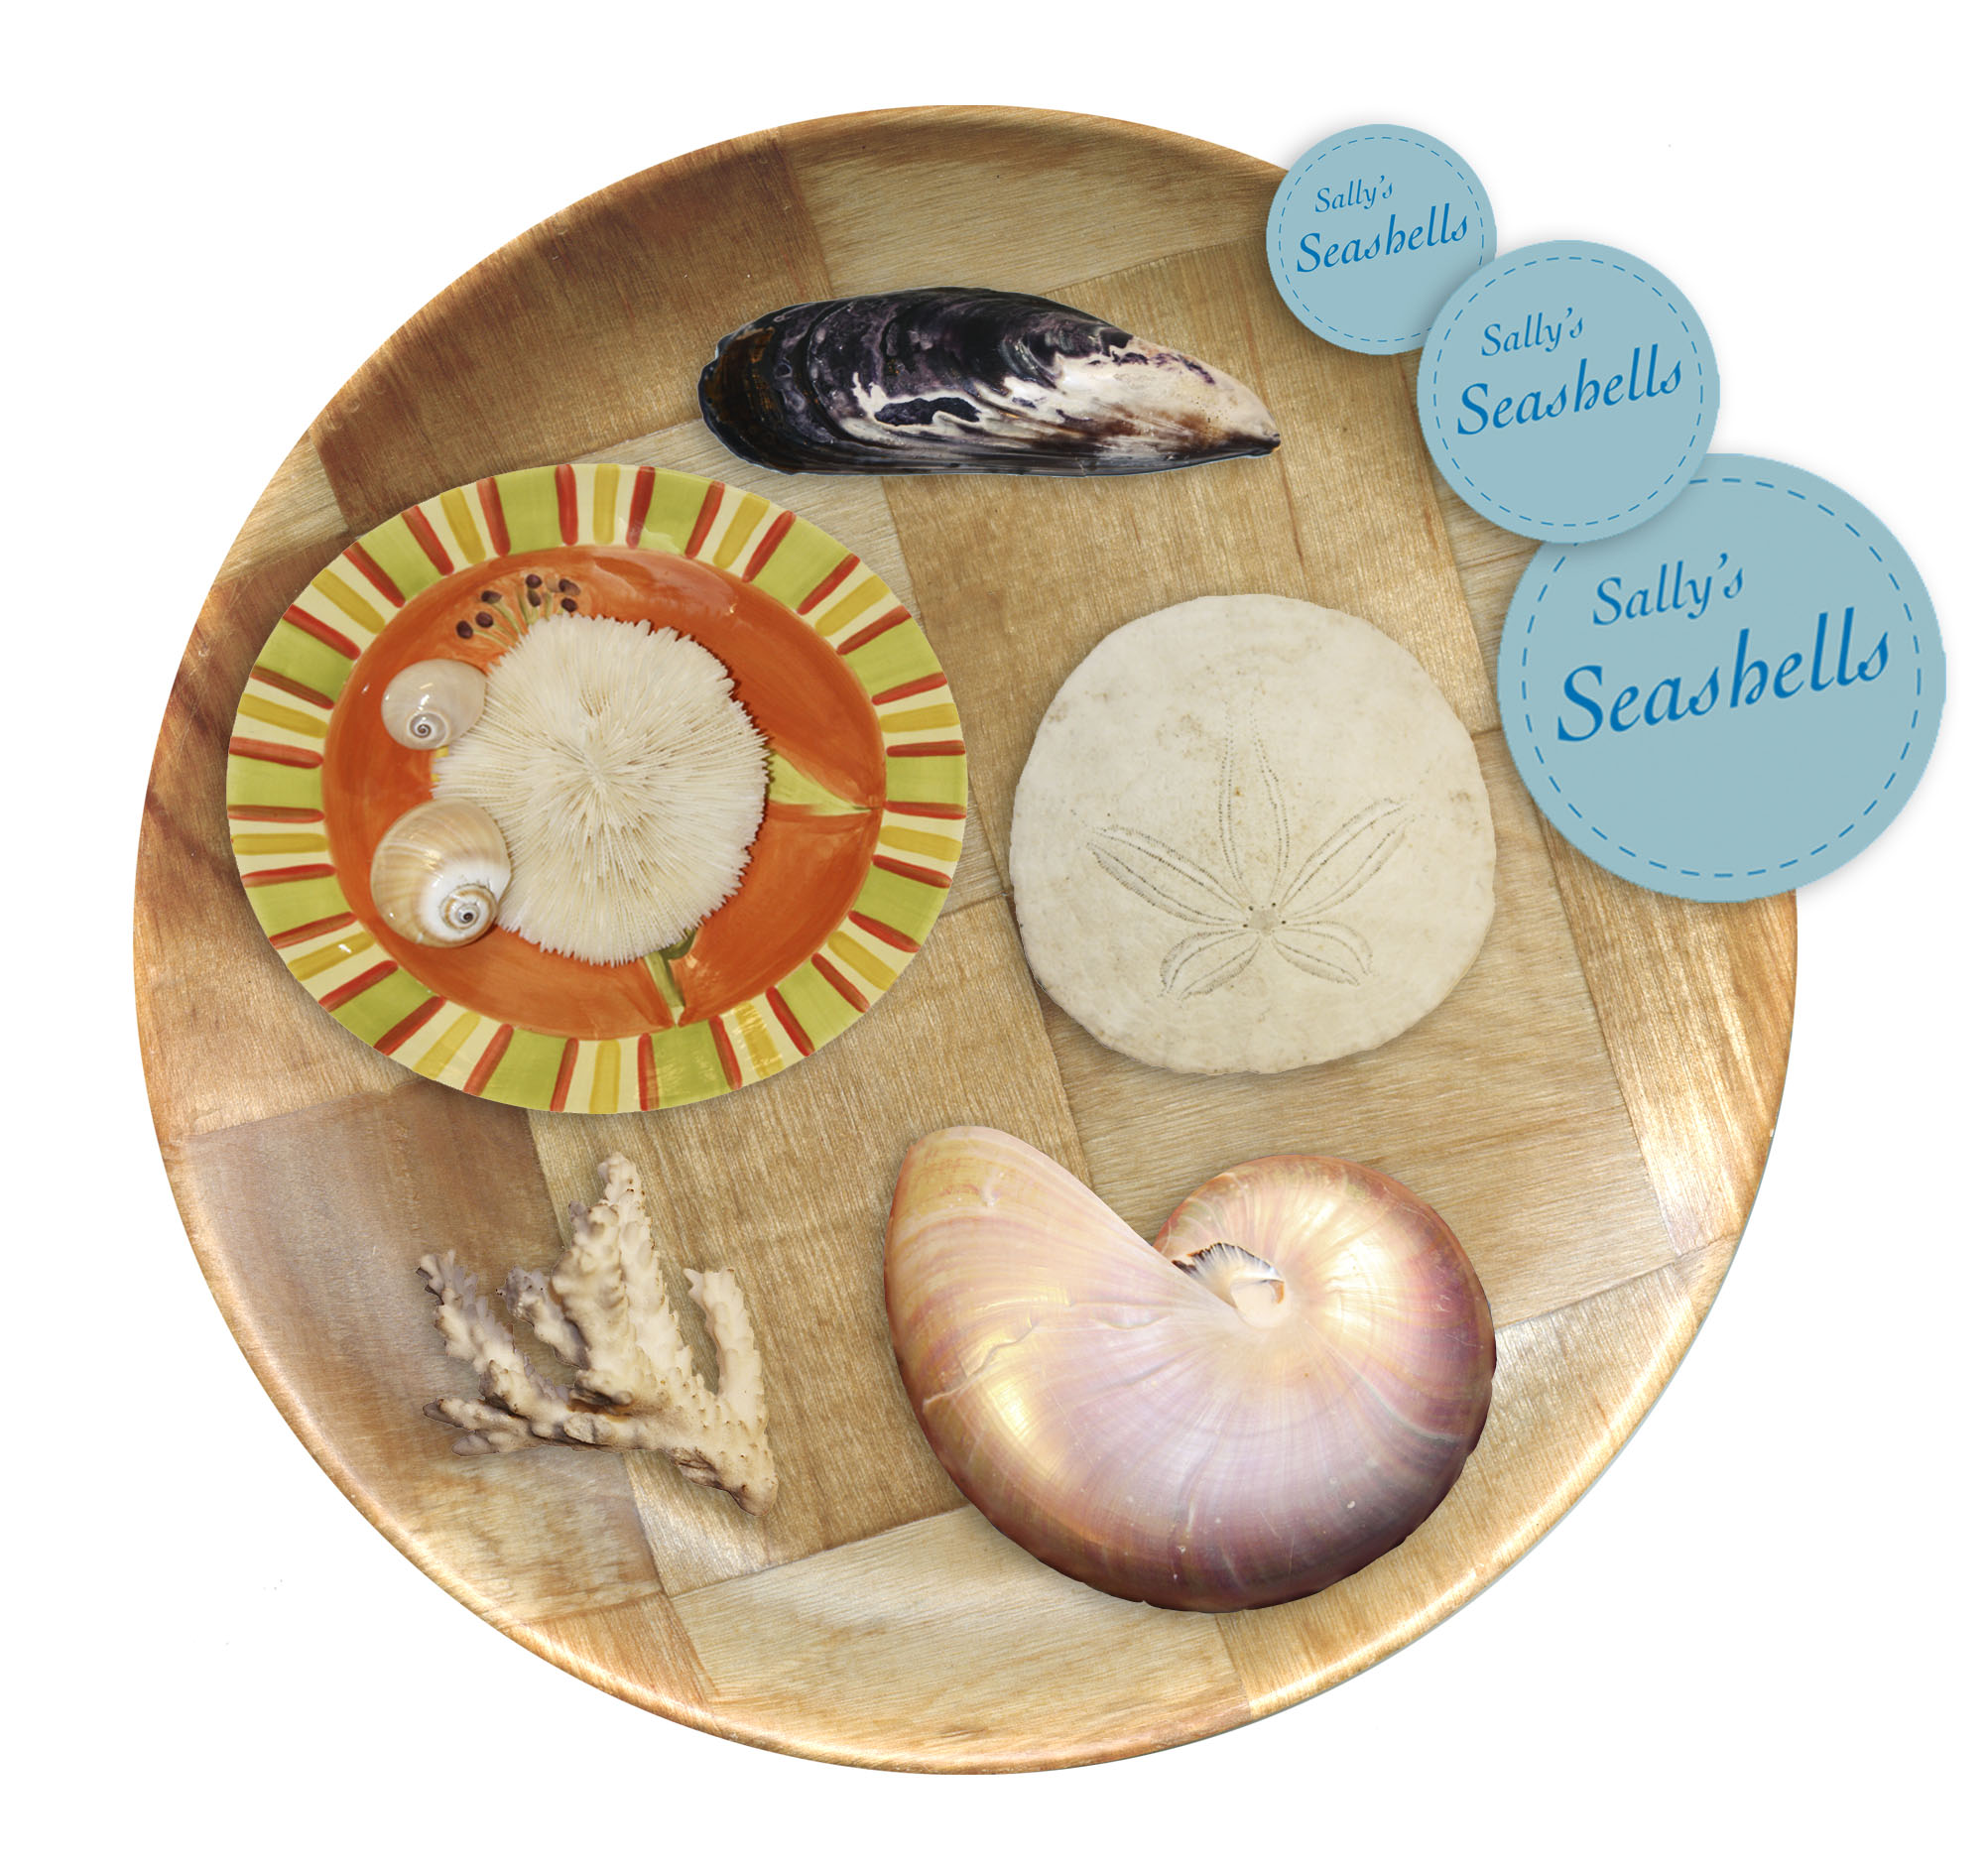
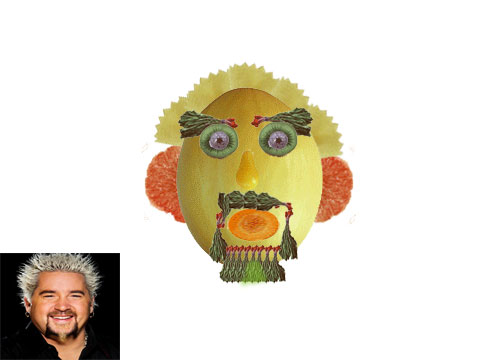
U3-A1-Fruit-Chef-Head-Assignment or GOAL IMAGE Sea Shells - Start Image
U3-A2-Make-Your-Own-Melon-Head-Based-On-Celebrity
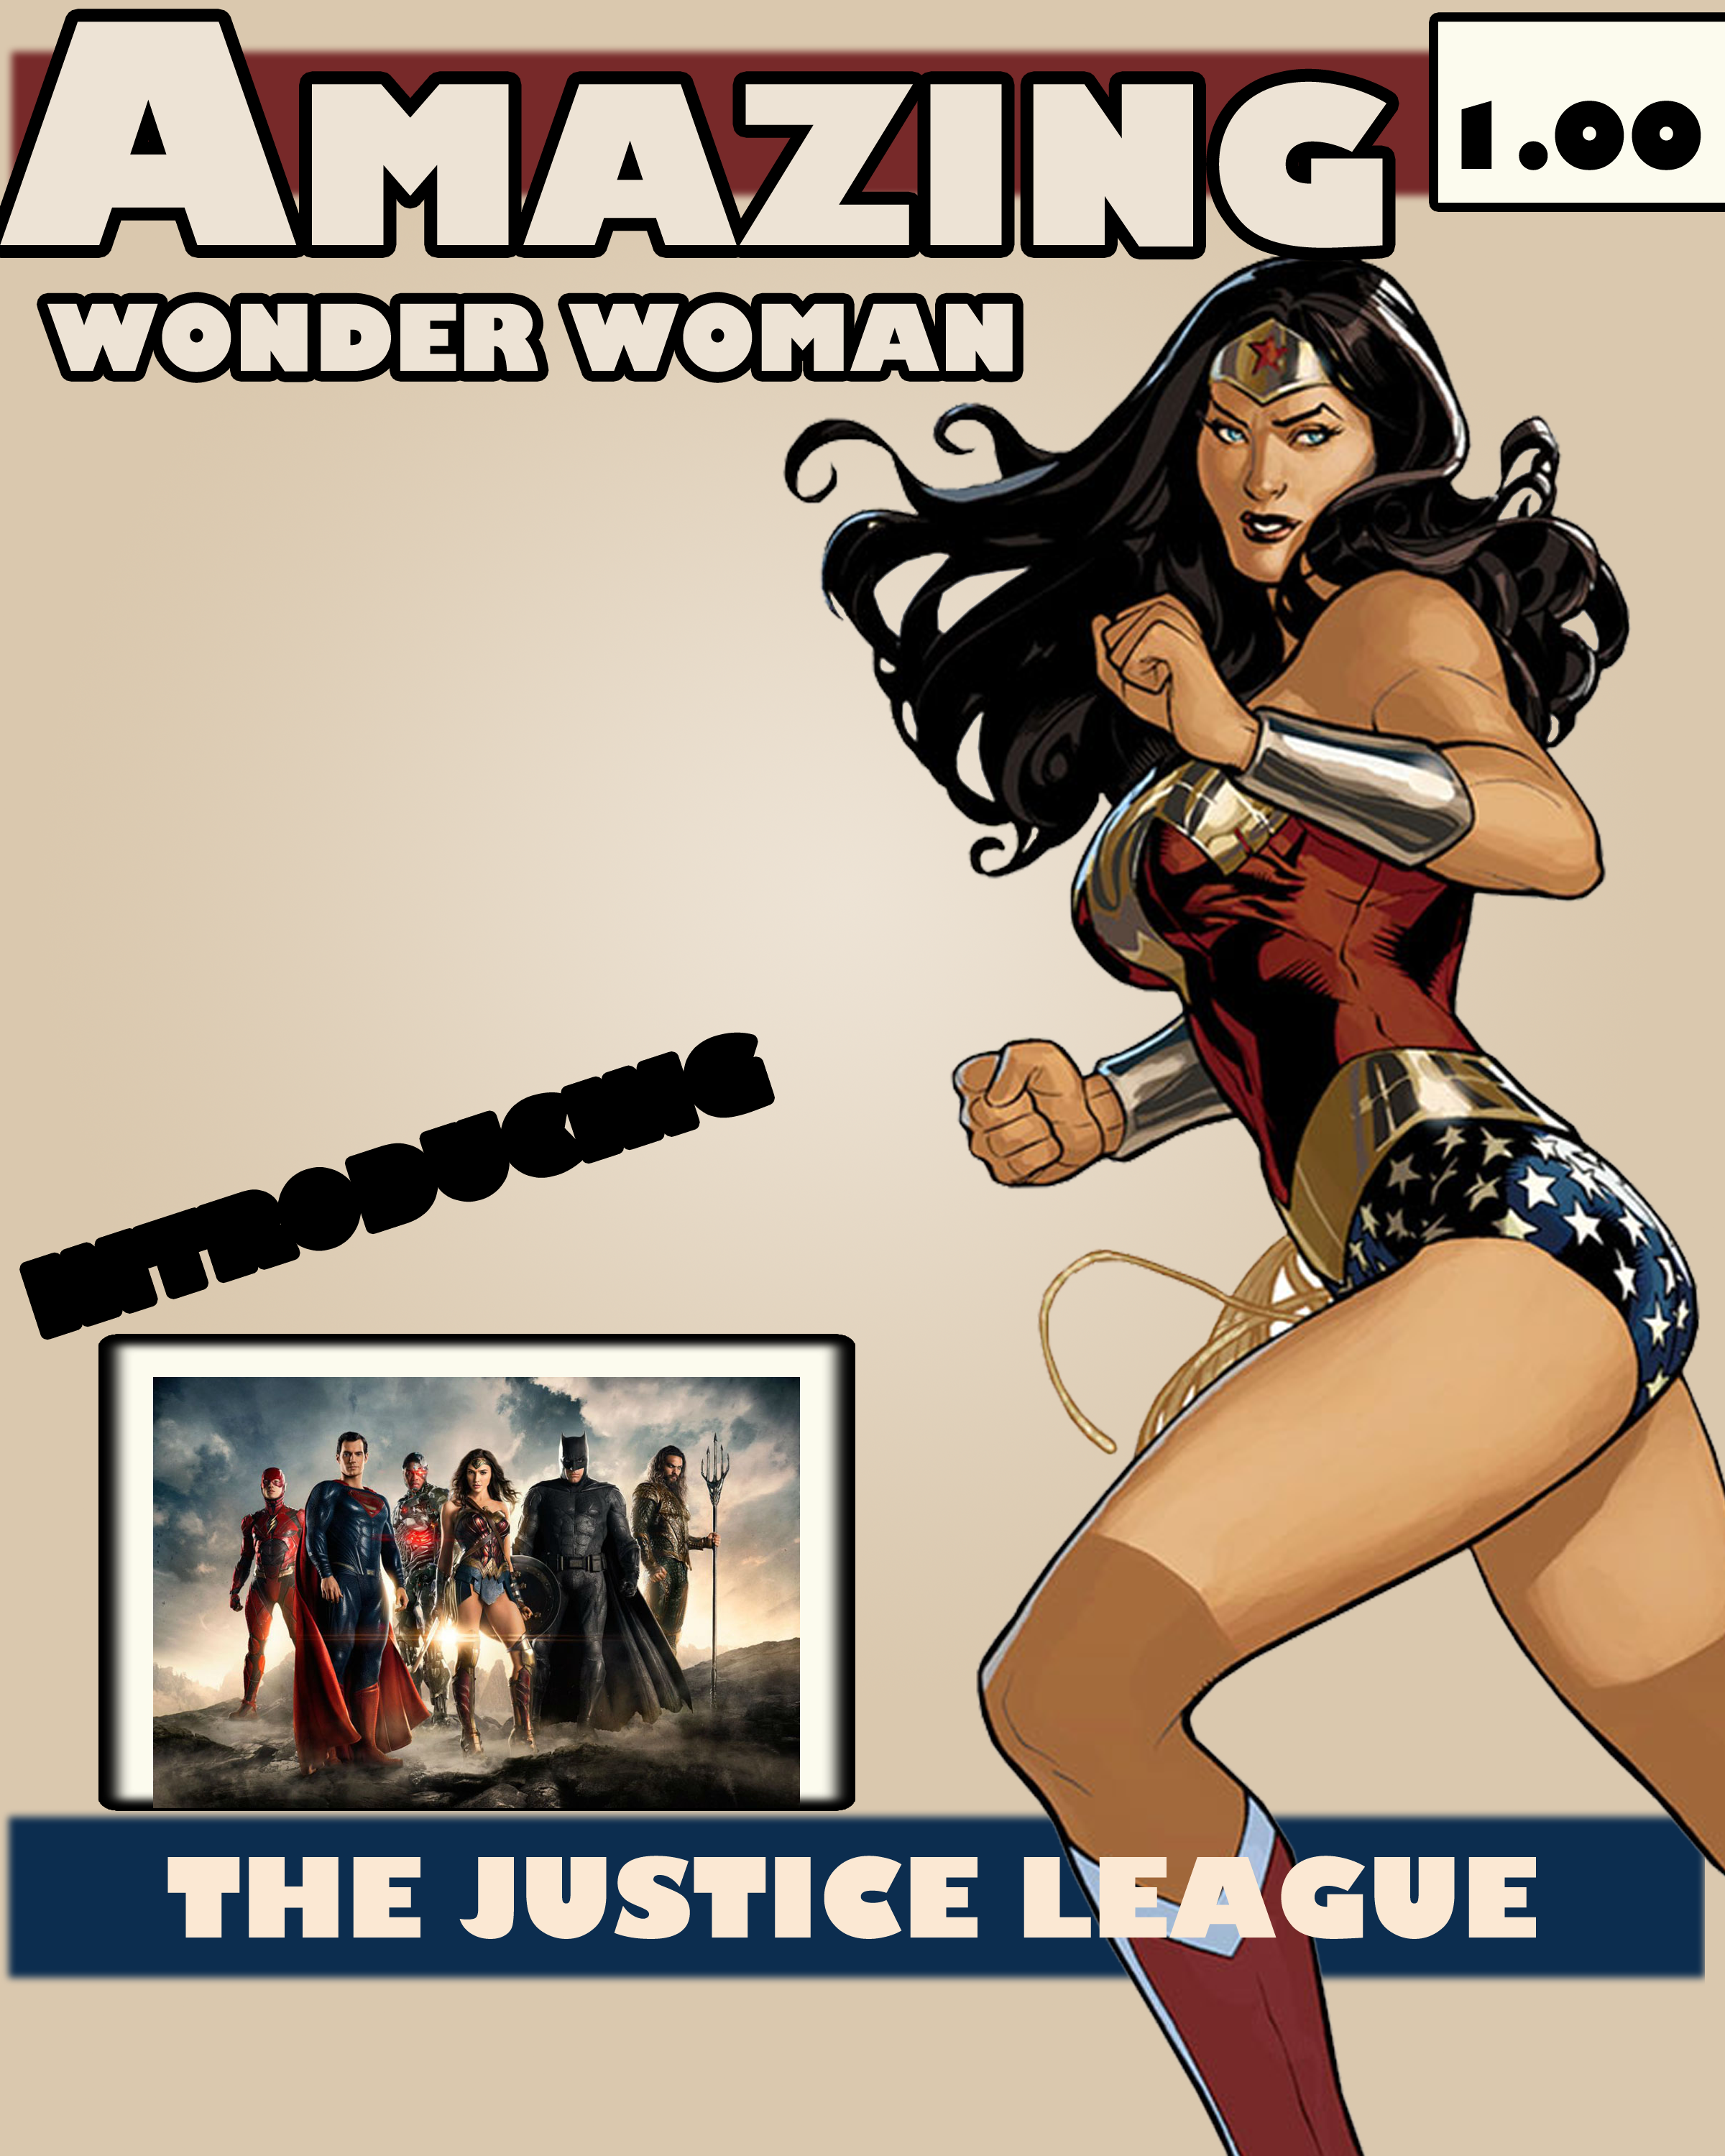
U3-A3-How to make a COMIC book cover - Ms. Salvo's Amazing Wonder Woman
- Advanced - Street Fire Composition (those who have already taken previous course and create SuperHero Poster)
- Advanced - Comic Book Cover Pt 2
Photoshop Assignment #1 - Comic Book Cover Rubric - Due April 11
Week 7 - Create A Comic Book Cover For Your Animation - Webber's Wild Adventures
Week 8 - April 15 - April 18th
- Lesson Three > Layers Assignment
- Photoshop Video TutorialLesson 03 - Layers Start Image - Beach file - Flowers2.psd and is not automatically a smart object
- once you have placed the file into the Lesson file - right click on that layer and convert to a smart object - Assignment -U3-A4-Layers - All Students - Create A Postcard Party Invitation Using Blue Lighting Video
- Files you will need Island Party PSD file: http://goo.gl/VStRIj Palm Leaves: http://goo.gl/uoIqa7
- Photoshop Video TutorialLesson 03 - Layers Start Image - Beach file - Flowers2.psd and is not automatically a smart object
Easter Card Photo Manipulation Tutorial (Adjustment Layers) - April 19 - April 22
or
Vintage Easter Card Using Layer Effects
Easter - Good Friday to Easter Monday No School
Week 9 - Clipping Masks and Photo Editing Clipping Group
Sport Poster Create Epic Poster Design for Cristiano Ronaldo
Used Stock Images: http://www.pngmart.com/image/15170 https://wallpapercave.com/w/9i0Bevr
Level II
Mask "puting an image inside text or an image inside a shape"
Letter Portrait Tutorial
Model V : https://www.deviantart.com/art/Modern-Witch-III-439808524
Model Z : https://www.pexels.com/photo/attractive-beautiful-close-up-eye-lashes-596486/
For more Photoshop tutorials you may want to book the following website.
Level II +
More Advance Text Masking TutorialModel ( with glasses) : https://www.pexels.com/photo/attractive-beauty-blonde-blur-354951/
Model ( couple ) : https://www.pexels.com/photo/photo-of-man-and-woman-on-road-843256/
Model ( standing) : https://www.pexels.com/photo/woman-standing-at-home-307790/
Font: https://www.dafont.com/the-bold-font.font
Summative
Read the following instructions for Collage Assignment - Collage Assignment - Annie Collage Portfolio Sample *now is a good time for file maintenance - a folder on your student drive labelled Adobe Photoshop - should contain the technical lessons folder and a Works in Progress folder, followed by a completed works folder labelled Photoshop Hand In
Photo-collage Rubric
Photo-editing 1 - Gondola Tutorial - Crop Tool, Rubber Stamp row boat, Saturate tool red white striped blanket,
Color Replace Green blanket
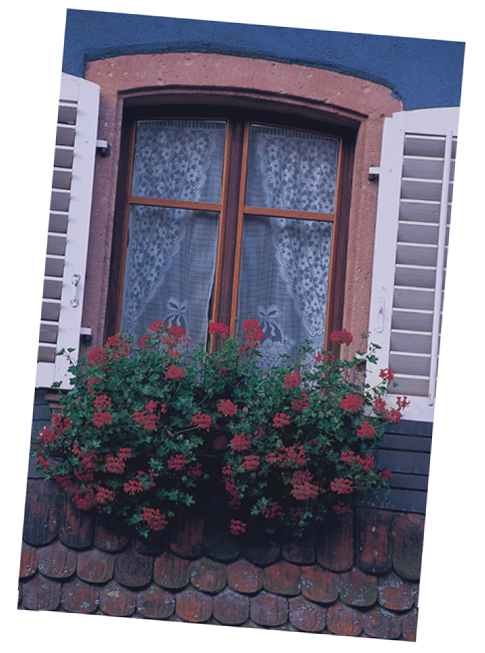
Photo-editing 2 - Flowers In Window Pt 1 - Flowers In Window Pt 2- Crop, Dodge the Flowers In Drape, Saturate Flowers In Window,
Image Colour Replace Orange tile with Green, Brightness and Contrast Window
Week 10 - Painting Quick Mask, Layer Masks, Vignettes Happy
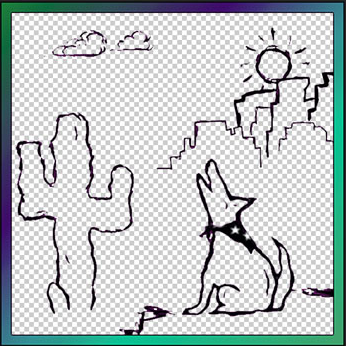
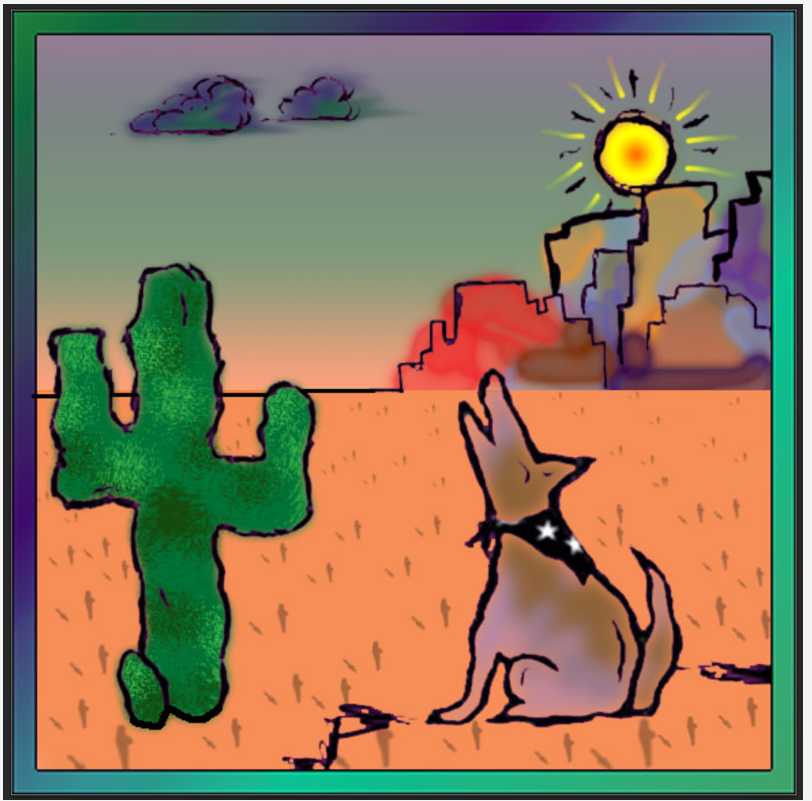
Painting - Gradient Tool - Coyote Before - Coyote After - Gradients, Smudge, Window Brushes, Wet Edges, Splatter
- Tutorial from Sketch to Colored Marvel Tutorial
- Famous Art Color Pages - Make Your Own Impression Using Photoshop Brushes
-Level II- Advanced Digital Painting Tutorial
WeeK 11 - Filters - Principles of Design
Design A Retro Science Fiction Film Posters -
Click on the following link for directions.
Typography - Clipping Group
Filters
Advanced Design A Science Fiction Poster
Design a Movie Poster using Layer Mask
Assignment Design Your Own Movie Poster Using Layer Mask and Filters
Movie Poster
PHOTOSHOP EFFECTS
SUMMATIVE MOVIE POSTER ASSIGNMENT - Use of 3 Layer Mask, Clipping Groups and Typography.
balance
contrast
dominance
gradation
harmony
repetition
unity
Assessment: Movie Poster Rubric
Advanced Level 2 - Movie Poster Tutorial
Week 12
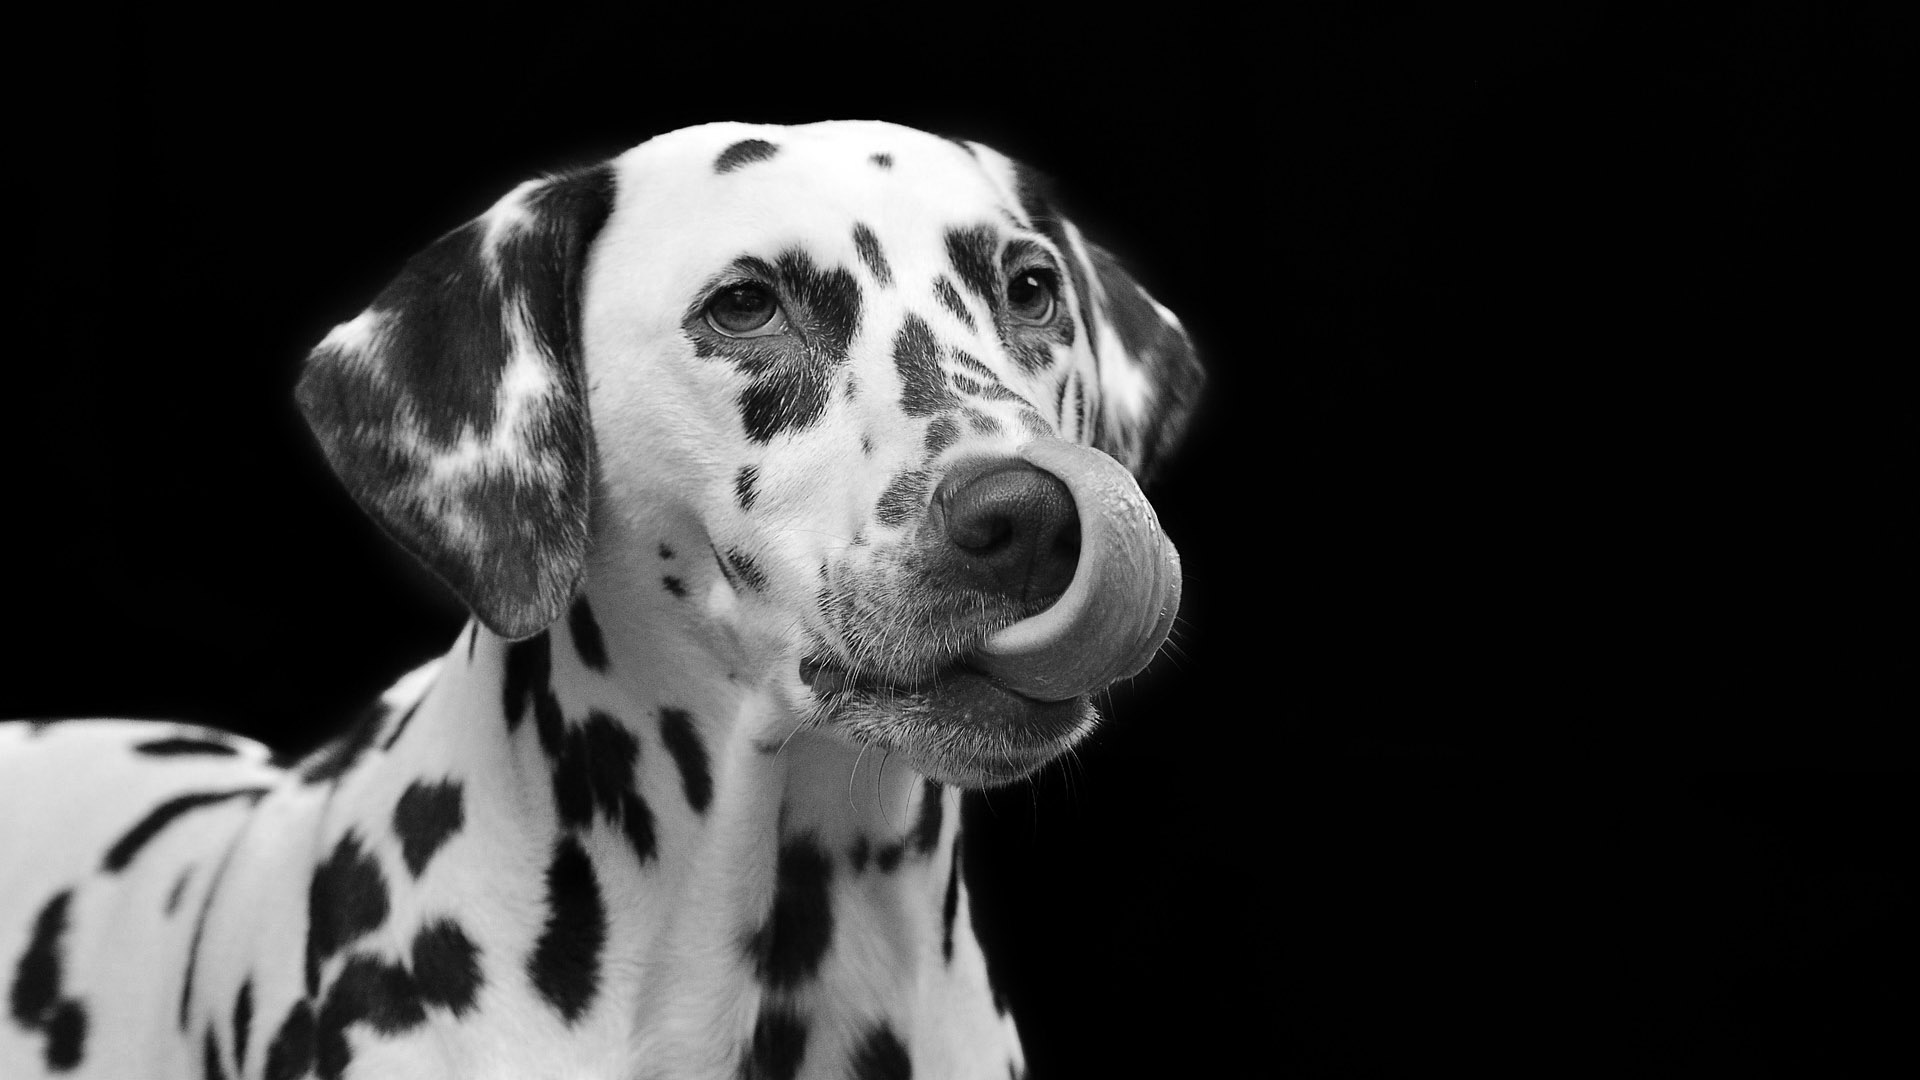
Colorizing Black and White Photo - Here you can download a tutorial files: Colorize files - Boy - Dog
- Colorizing Black and White Photo - Blue Lightening T.V.
How to colorize Photo in Photoshop Intermediate - CMYK - CURVES - HUE AND SATURATION ADJUSTMENT LAYERS
Colorizing Black and White Photo Level II
Test Colorizing B & W Photo - Kim Anderson
Advanced - Double Exposure Video
Photo-editing 2 - Flowers In Window Pt 1 - Flowers In Window Pt 2- Crop, Dodge the Flowers In Drape, Saturate Flowers In Window,
Image Colour Replace Orange tile with Green, Brightness and Contrast Window
Flowers In The Window
Advanced - Photo-retouching Workbook - Pick any of the following tutorials to enhance an orginal composition.
Layer Mask
Classic Vignette step by step
Using Layer Mask basics and Vignettes
Using refine edges to Make a Mask
Using Masks and Channels
Layer Mask and Blend Modes
Typographic Design
Week 13 - Pen Tool - Drawing Paths - Making Selections - Using ALT (change direction) and CTRL (move path)
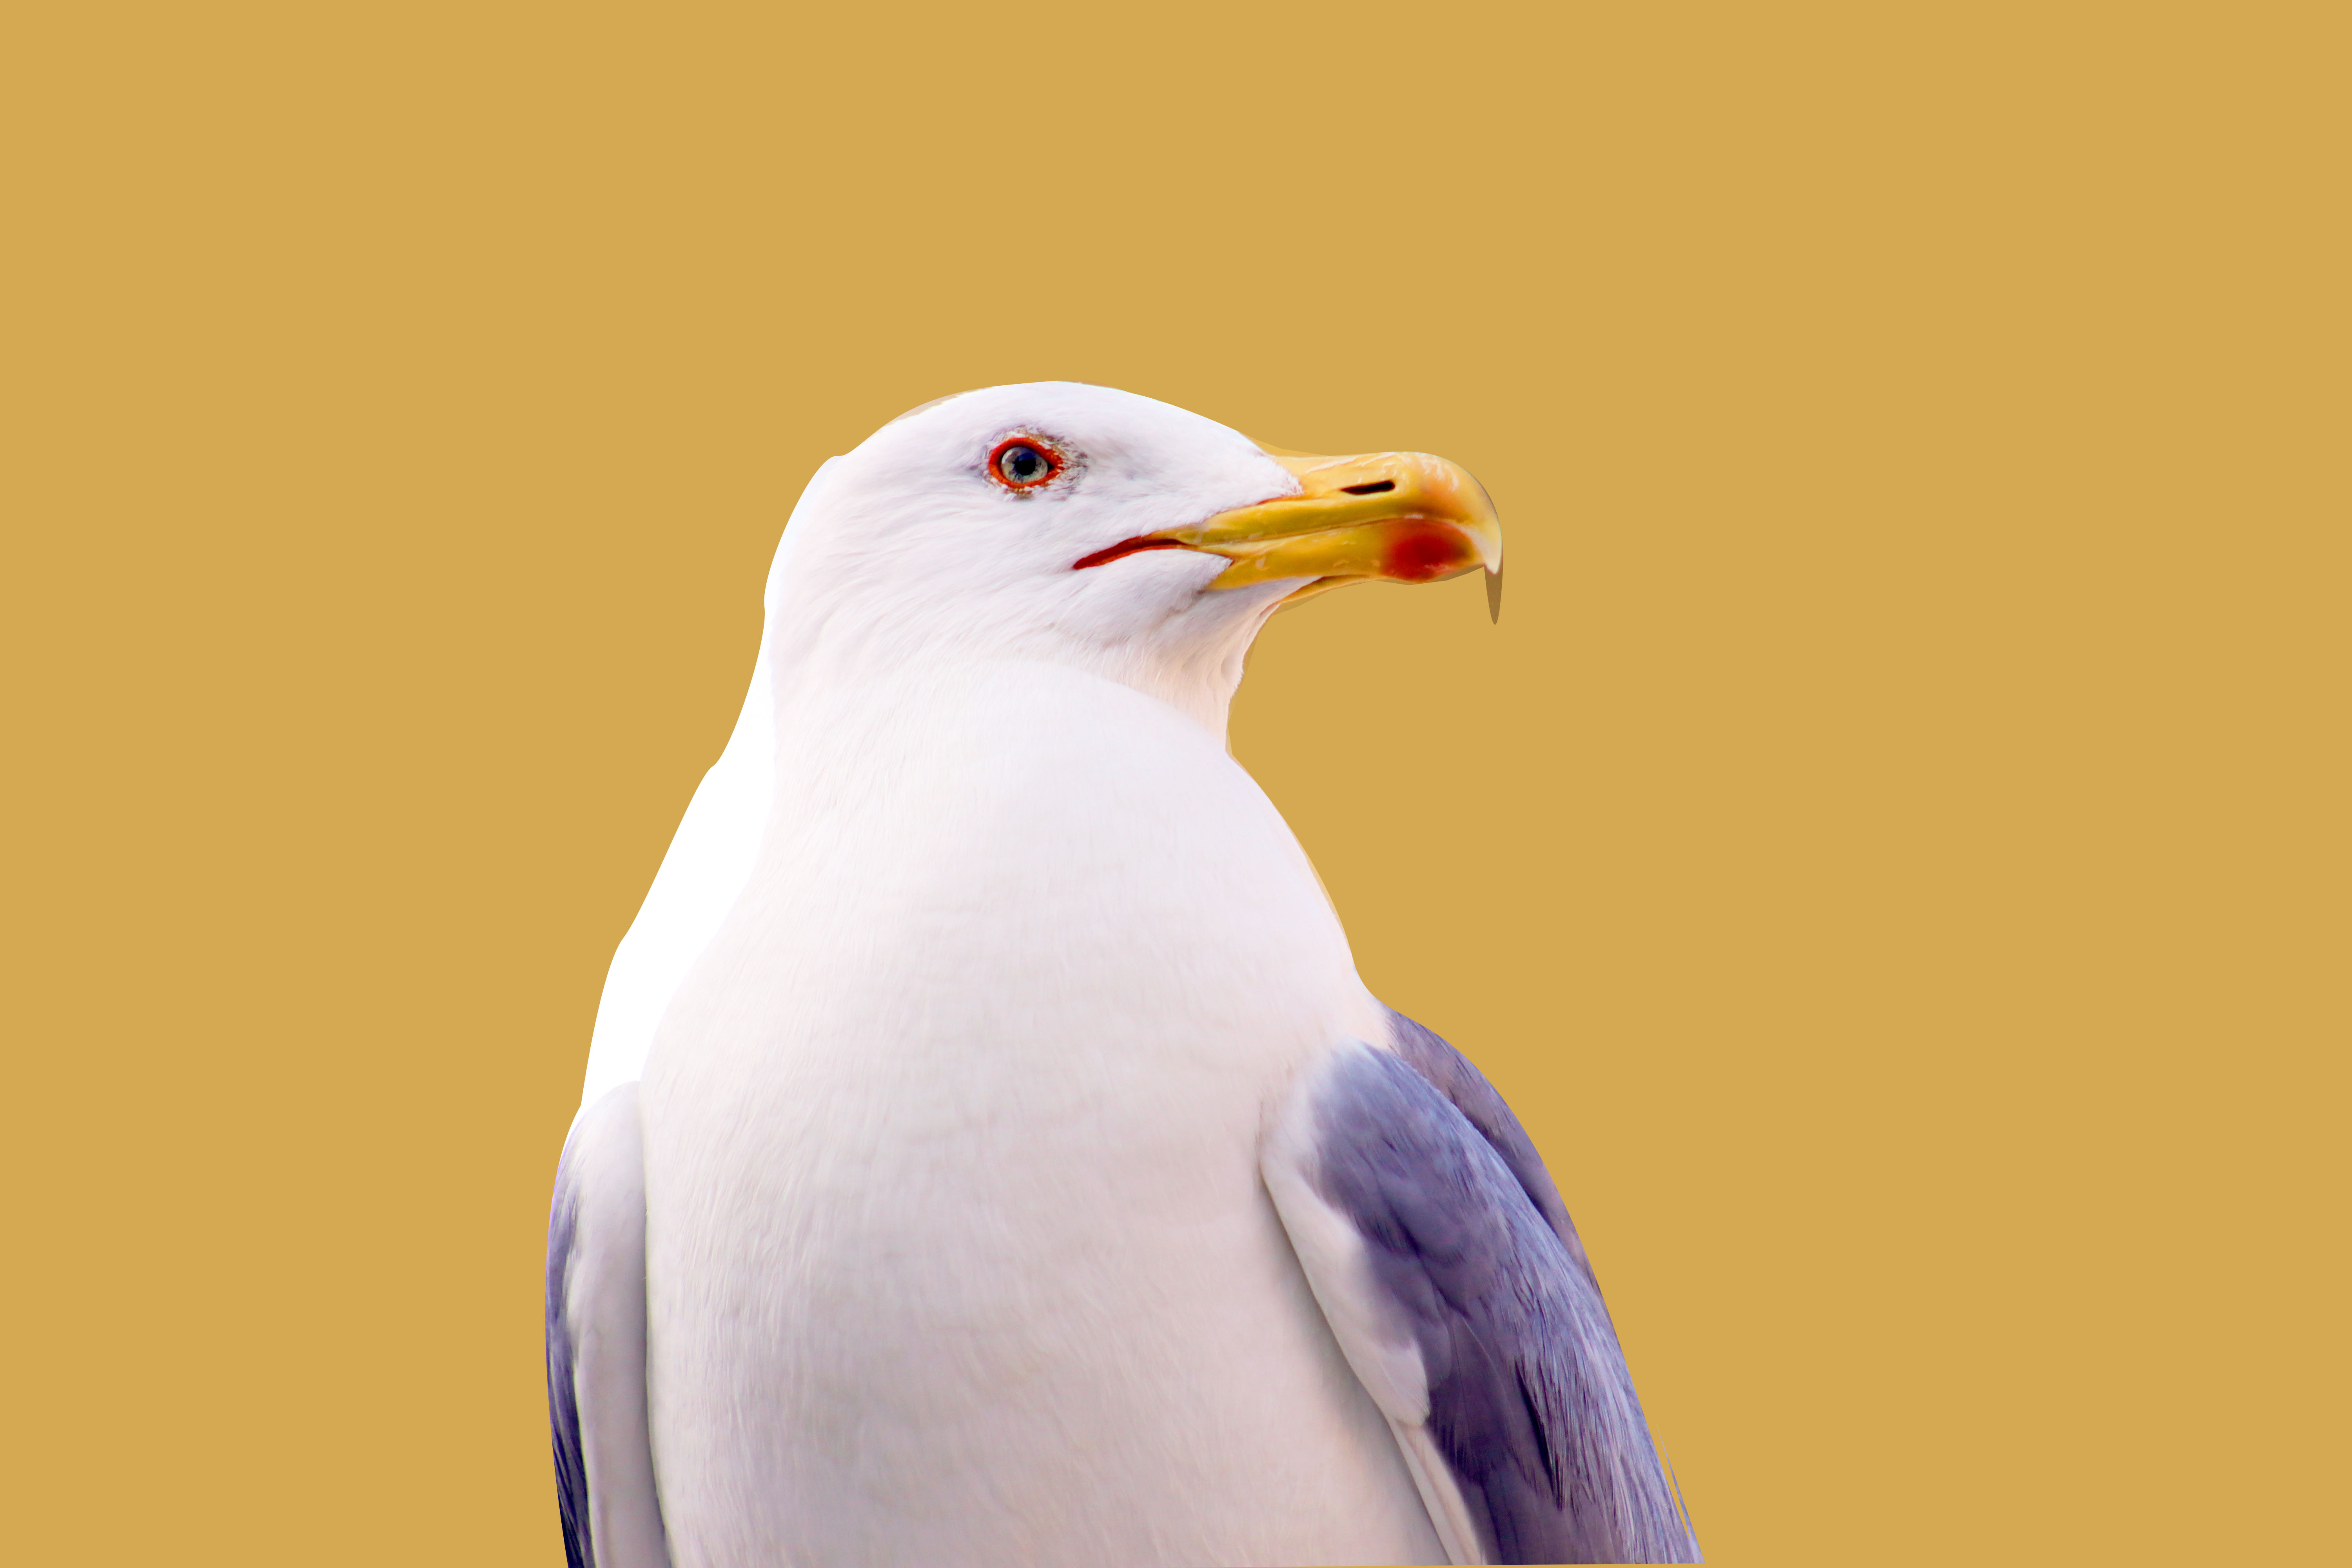
Pen Tool In Eight Minutes - Find the Seagull File In Paths Folder on the x: drive
Pen Tool - Batman Logo Tutorial - Find the Batman logo template in the Paths folder on the x: drive
Summative Assignment Beginner - Bird Tutorial - You will need Bird file template.
Summative - Advanced - Using the Shapes, Brush and Pen Tool In Photoshop To Create Ice Cream Logo
Cut out an image using a Layer Mask - Use the following SUNFLOWER IMAGE
Cut image (woman) out of background Part II - Woman Image
Pen Tool - 5 Reasons To Use Pen Tool
1. Most accurate way to make selections
2. Paths are always editable
3. Saves your path for return access in the PATHS PALETTE
4. Makes accurate selections from paths
5. Its selections can cut anything out
Pen tool
1. Create simple curves (create straight lights or curves and have the pen tool join the points together) - use few points as possible
2. Keyboard Shortcuts
- CONVERT ANCHOR POINTS - ALT and DRAG - Point into a CURVE or CURVE into A Point
- DIRECT SECTION - CTRL KEY
- WINDOW PATHS (PALETTE)
More Pen Tool Tutorials
Pen Tool - Apple - Pineapple Tutorial - find Apple - Pineapple file in the Paths folder on the x: drive
Pen Tool - Photo to Cartoon - find the model man file in the Paths folder on the x: drive
Font - AGENCY FB, ARCH UPPER, BEND -20 "Incredible2"
RGB Background Colour R 202, G 44, B 16
Using the Pen Tool - Create a Logo For And Poster For Incredible 2
Week 14
Pen Tool - Photograph to Vector Image Assignment
Text Effects - Blue Lightening TV
Advanced - Creating Obama's Hope Poster Design
Summative - Putting It All Together - Creating a Website with Adobe Animate - - Video Tutorial -
- creating a button in Adobe Animate CC
- adding ACTION script to a buttons
Week 15 - Adobe Illustrator
Adobe Illustrator
(Portfolio Uploads - Level 1,2,3 WorkSheet And Level Up Activity - UPLOAD U3 Portfolio
Intro to Adobe Illustrator
Explore and build skills in Adobe Illustrator
This assignment\introduction will be self-paced. Students in this class have taken multiple Comm Tech classes, and\or this may the first time accessing Illustrator. We will review the expectations of the worksheets and technique. The video's will assist you with the Introduction to the software.
Upload Activities To Your Portfolio Unit 3 - Adobe Illustrator - For Sample Logos See SportsLogos.Net
LINKS: Level ONE Worksheet | Level TWO Worksheet | Level THREE Worksheet | Level FOUR Worksheet
Level ONE Videos Pencil Level TWO Videos Level THREE Videos Level FOUR Videos
V+ Logo Pen Tool Exercises
***Remember Polygons ADD SIDES use Up or Down Arrows with the Polygon Tool ******
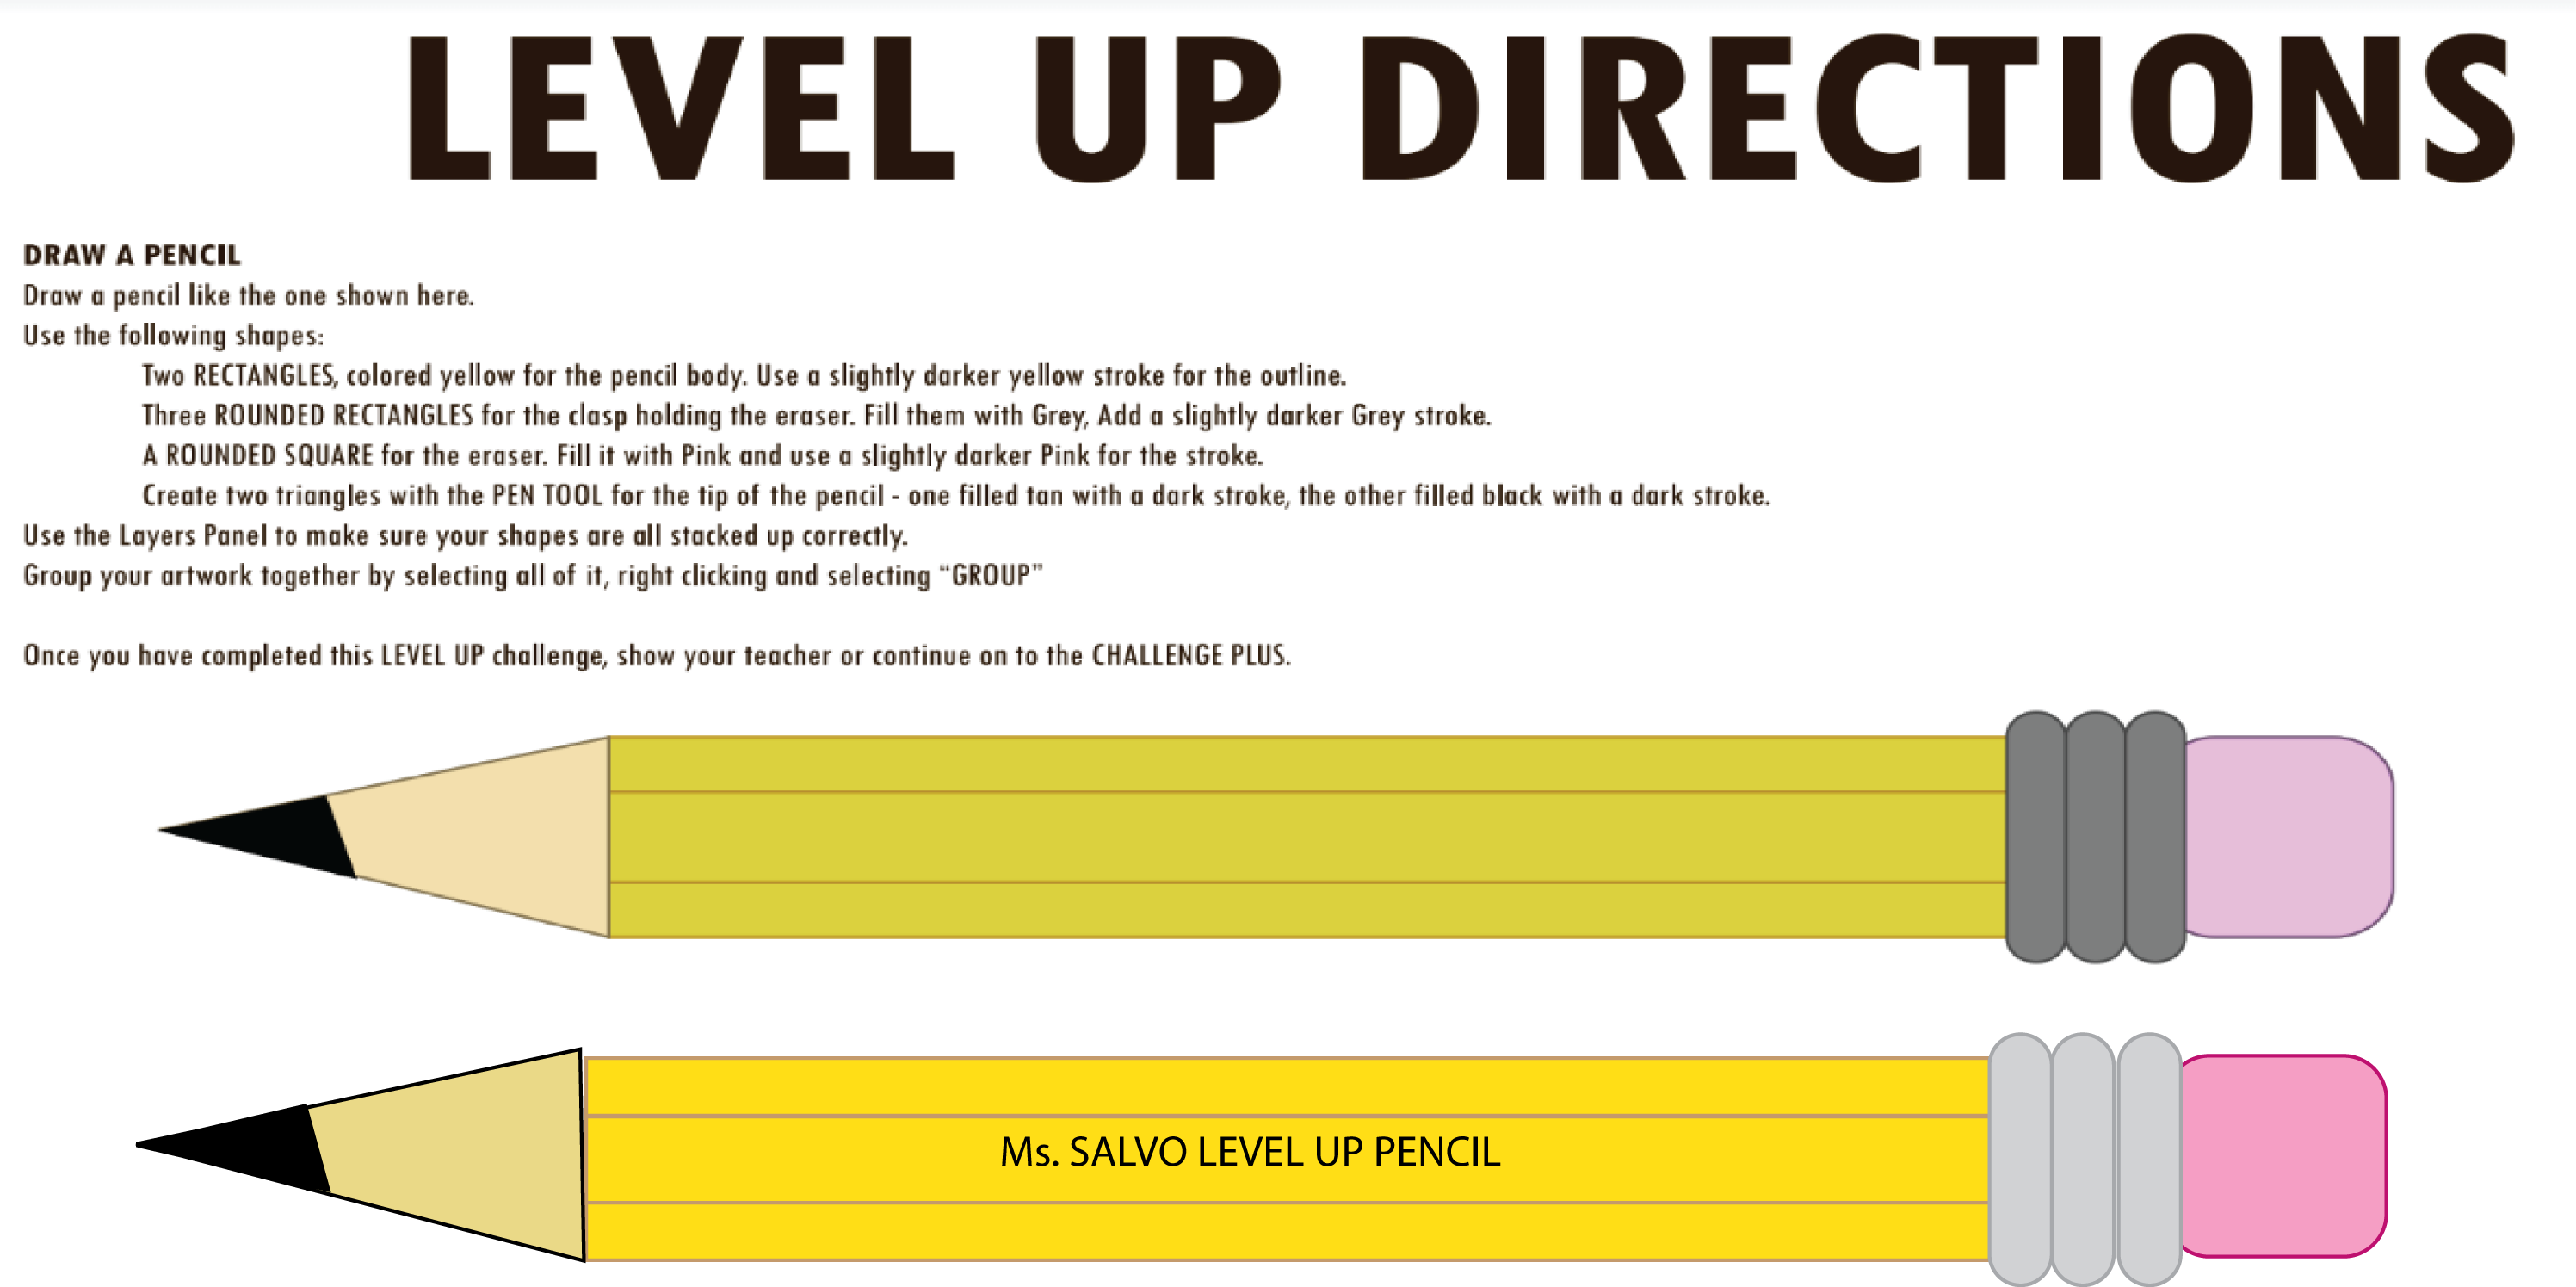
Ms. Salvo's Level One Practice Sheet (Upload Your Practice File To Your Portfolio Before LEVEL ONE CHALLENGE) - UNIT 3
Ms. Salvo's Level One Pencil-Level-One-Challenge - Upload Your Pencil And Any Other School Supply Designs To Your Portfolio
Advanced Illustrator Tutorial - Dog
Advanced Illustrator Tutorial - Glass Planet
Preparation For Culminating - How to Draw Max - Secret Life Of Pets 2 Secret Life Of Pet 2 Preview
For those you have taken Adobe Illustrator in a previous COMM TECH CLASS, please see the following ADVANCED TUTORIALS.
Week 16
How to Animate a Walk Cycle?
Walk Cycle PDF - Instructions
How to create a looping background Part I
How to create a looping background Part II
Week 16 - Final Culminating
--------------------------------------------------------------------------------------------------------------------------------------------------------------------
Other Flash Videos That Might Be Helpful For Your Christmas Card
Creating Starfield
Animated Starfield
Sparkle. Twinkle Animaitons
Monday
Character Animation - Meet the characters of the Trolls Movie from Dreamworks.
Part One - Draw you character and have each part of your character on a separate layer.
Don't forget to create symbols for the parts you want to animate.
Press F8 to create symbols and add them to the library.
Click here to view Ms. Salvo's Troll Character. For inspiration you may want to preview the movie trailer.
Tuesday
Uploading Files To Your Portfolio
***Special Notes***-If you haven't uploaded your Flash animations, you must upload the following in Unit Two.
(You must upload the *.SWF file for the following: 1.Haunted House (bats flying, zooming in and out), 2.Sailboat (motion and shape tween), 3. Butterfly (your drawing - following a motion guide), 4. Button) Remember you need to upload the .SWF file and the image file that shows a snapshot of your screen, In Flash to save the image file, click File Export, PNG.
Create a Character walking across the stage
Click here to see more characters from the movie Trolls.
Wednesday
Review what we have learned in FLASH by viewing the following video. Quiz on Flash tomorrow.
Here is a review of the CLASSIC TWEEN to add different colour effects to the background.
Create a scrolling background for your character. Here is a detailed tutorial on how to create a background.
Click here to view the different backgrounds used in the Trolls Movie.
Flash Week 2
Flash Tutorial Quiz Thursday on Flash Basics
Monday
Tutorial 1: Basic Shapes - Create a Sailboat
Tuesday
Tutorial 2: Motion Tween - Animate your sailboat across the scene - Press F8 to create a symbol, select the center point,
F6 key frame at 50, right mouse click motion tween again
Wednesday
Watch the following video on creation a MOTION GUIDE PATH to make a graphic object follow a drawn line in ANIMATION
Find a butterfly on the internet and make it follow a path through a motion guide layer
1. Put a butterfly on a seperate layer
2.Press F8 to create a symbol (center point)
3. Right mouse click on Butterfly layer, Create Motion Guide
4. Using the pencil tool draw a curved line for the butterfly to follow
5. Select Frame 50 on the butterfly layer and on the motion guide layer ( select vertically down) press F6
6. On keyframe 1 make sure that the butterfly is snapped at the beginning of the path, at keyfram 50 ensure the butterfly is snapped at the end of the path,
7. On the butterfly layer right mouse click and select Create motion tween
For the Sailboat Remove Frames 2-49 and repeat the steps 1-7 above
Press CTRL ENTER to test the animation
Tutorial 3: Motion Guide - Draw a guide (path) for the sailboat to follow (wave line)
Thursday
Tutorial 4: Shape Tween - Use a shape tween to create a flag flapping in the wind.
Friday
Upload Halloween Scene, Sailboat and Butterfly to your Website
Look at Vanessa Richardson's portfolio page to see all the files you need to upload to the Flash Animation -
Unit 2 on your website. Ensure that you have a thumbnail of your the images of your stage and that when you click on it, the animation .SWF file appears.
Tutorial 5: Button - Create a button for your portfolio website.
Monday Week 2 Animation
ACTIVITY #1: FLASH 101 - BASIC TRAINING (1-2 CLASSES)
Work through the following tutorial activities to develop essential skills in Flash (resources from Adobe Exchange). All links are PDF files. You may also want to review the Intro to Flash Powerpoint HERE.
- Guide 1 - The Flash Workspace
- Guide 2 - How to Create an Animated Face
- Guide 3 - Symbols, Instances and the Library
- Guide 4 - Frames and Keyframes
- Guide 5 - Creating Animation in Flash CS4
Bonus - If you have completed the HALOWEEN SCENE with a bat movie clip and bats flying across the screen, try to include a witch fly across the screen.
Monday (reminder all Unit 1 projects were due Friday Oct 28, not received later Thursday, Nov 3)
Halloween Scene Video
Each day we will be learning a few skills in FLASH to transfer the skills learn in UNIT 1 - GRAPHIC DESIGN to WEB DESIGN
Unit Two - DAY 1 Animation - Introduction to Flash
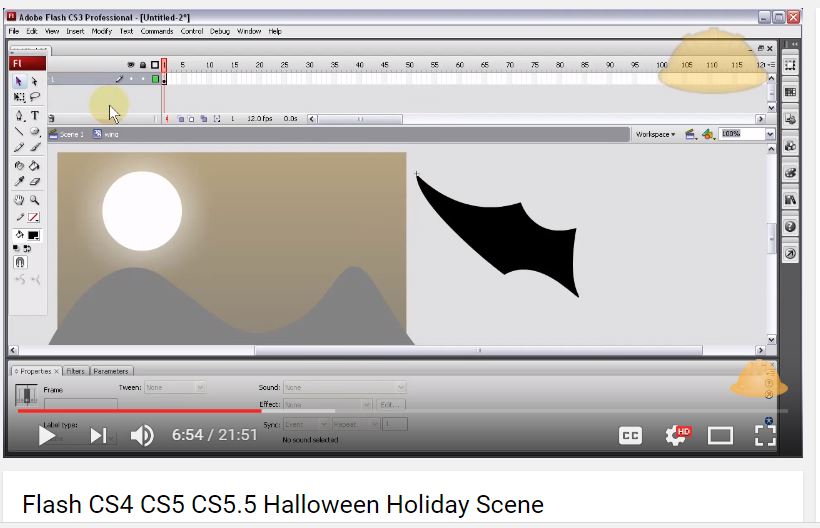
Monday - create a Halloween Scene using the following tutorial -
Before you begin - SELECT WINDOW, ANIMATION to change the FLASH SCREEN PRESET
1. Layer1 - SKY- Using the PRIMITIVE RECTANGLE TOOL, and GRADIENT FILL COLOUR create A SKY layer to fill the stage
- CREATE A CUSTOM COLOUR FOR YOUR GRADIENT, Window Colour
- USE THE TRANSFORM GRADIENT TOOL to make the gradient lighter at the top - WINDOW COLOUR - SELECT AMBER
2. Layer2 -MOON - USING THE PRIMITIVE OVAL TOOL AND HOLDING SHIFT CREATE A WHITE MOON
- PRESS F8 to convert the MOON to a MOVIE symbol
3. Layer3 - MOUNTAINS - using the pen tool, draw mountains and fill them in a dark colour
4. Press CTRL ENTER to view your scene in a browser - Call Ms. Salvo to view your scene
Flash - Halloween Scene
5. Layer5 - Create a bat layer. Draw the wing using the pen tool. Fill the wing with solid black colour.
Goal Week 3 - Bonus Challenge
Video Game Action Script (Alternative To PacMan Game)
Part 1
Part 2
Part 3
Part 4
Part 5
Part 6
Goal Week 3
Adding Sound Animation
1. Create Play and Stop buttons to add Christmas music to your Christmas card
2. Creating A PacMan Style Game Flash - Part One - Action Script
Copy and paste the ACTION SCRIPT BELOW:
Start Button
on(press) {
gotoAndPlay(2);
}
Frame Code:
stop();
Walls:
onClipEvent (enterFrame) {
if (this.hitTest(_root.char)) {
_root.char._x -= 5;
}
}
3. PacMan Action Script Part Two
Codes:
Character:
onClipEvent (enterFrame) {
speed = 7;
if (Key.isDown(Key.LEFT)) {
this._x -= speed;
_root.char.gotoAndStop(2);
}
if (Key.isDown(Key.RIGHT)) {
this._x += speed;
_root.char.gotoAndStop(1);
}
if (Key.isDown(Key.UP)) {
this._y -= speed;
_root.char.gotoAndStop(3);
}
if (Key.isDown(Key.DOWN)) {
this._y += speed;
_root.char.gotoAndStop(4);
}
}
Food:
onClipEvent (enterFrame) {
if (this.hitTest(_root.char)) {
_root.dot.gotoAndPlay(2);
}
}
Frames:
stop();
4. PacMan Action Script Part Three
Scripts:
Frame 2:
stop();
score = 0;
Dot:
onClipEvent (enterFrame) {
if (this.hitTest(_root.char)) {
_root.dot.gotoAndPlay(2);
}
}
Dot Frame 2:
stop();
_root.score+=10;
Invisible Object:
onClipEvent (enterFrame) {
if (_root.score == 30) {
_parent.gotoAndPlay(3);
}
}
All Frames:
stop();
5. PacMan Action Script Part Four
host:
(Replace GREATERTHAN's and LESSTHAN's with the actual simbols)
onClipEvent (enterFrame) {
speed = 2.5;
if (_root.char._xGREATERTHANthis._x) {
_x += speed;
}
if (_root.char._xSMALLERTHANthis._x) {
_x -= speed;
}
}
onClipEvent (load) {
speed = 2.5;
}
onClipEvent (enterFrame) {
if (_root.char._yGREATERTHANthis._y) {
_y += speed;
}
if (_root.char._ySMALLERTHANthis._y) {
_y -= speed;
}
}
}
Frame 2:
stop();
score = 0;
lives = 3;
Invis Object:
onClipEvent (enterFrame) {
if (_root.score == 30) {
_parent.gotoAndPlay(3);
}
if (_root.lives == 0) {
_parent.gotoAndStop(4);
}
}
Try Again:
on (press) {
gotoAndPlay(1);
}
Final Culminating Begins: Monday, January 16, 2017
TGJ2O Culminating
Storyboard Template is saved in Adobe Flash.
Part I - Storyboard -Adobe Illustrator /Adobe Flash-
Please ensure what that your storyboard with all FOUR scenes is uploaded in Unit Four by end of today. You can copy and paste Adobe Illustrator CS4 into Flash or work directly in Flash.
Part II - Animation - Please ensure that the full animation(movie with sound effects) is uploaded by Tuesday (.SWF and .Fla)
Part III - Promotional Poster - Adobe Photoshop - Adobe Illustrator
Please ensure that the poster is uploaded by Wednesday.
Here is a sample movie of Webber Blues.
Welcome Back
In preparation for the Culminating, we will continue to explore Flash
Begin with 3.6 Realistic Character Animation. You will create a scene in which a Monster will jump up and down.
Ensure that you use EASE to customize the animation.
Find a CREATIVE COMMONS free image and download it to FLASH. You can click here to download an Adobe Illustrator File.
Upload the jumping Monster into your Flash Animation porfolio.
More preparation for the final cumination. In order to combine the skills we have learned (motion guide, motion tween) we created a four scene animation (Insert Scene - to show what may happen to Webber the duck as a result of acid rain).
For the culminating, we will be combining art drawn in illustrator or created in photoshop and animating it in Flash.
Here is the sample of Webber that we worked on today.
Quiz 2 - Photoshop Tools on Wednesday, Nov. 2nd - All Souls
Agenda Unit 1
Day One - Wednesday
Course Intro - Sept 7th
Why take this course?
Why study graphic arts?
Course Outline
- Logon,the Network - OEN
- Signing in using Chrome - [email protected]
- Classroom rule - Computers and BYOD Instructional Use ONLY
- Find the course website: mssalvo.weebly.com
- Passwords & Privacy
- Complete the introduction survey
- Course Questionnaire
Day Two - Sept 8th - Grade 10 Assembly
Highlights - B.Y.O.D. Instructional Use Only
(Since we have access to our own technology CELL PHONES are only to be used under teacher advisement)
Day Three
What is Comm Tech?
Thought Provoking Advertisement - Collaborate piece
Day Four Monday September 9th - Tech Teams Will Be Assigned - Groups of 3 and
- Google docs
- Everything changes now that you're using the CLOUD - let's find out how much it's changed!
- GoogleDoc Collaboration Test Tech TEAM - Topic: "Ultimate Tech Toys" Collaboration Test Two: "The Ultimate Pet"
- Privacy - Policies and Computer Conduct
- Be sure to properly LOG OFF your computer after you're done
- Which images can you find on the internet exemplify the ideal "CommTech Project" by effectively and completely changing:
- What you know
- What you feel
- What you think
- How you behave
- Which images can you find on the internet exemplify the ideal "CommTech Project" by effectively and completely changing:
- Collaborative Document - Part two - Exemplary Animations Videos - What is Comm Tech
- What videos on YouTube (or elsewhere) or images exemplify the ideal "CommTech Project" by effectively and completely changing:
- What you know
- What you feel
- What you think
- How you behave
- as well, how are they made, what technology is used to create the video,
- the software\ the hardware . . . . .
Tuesday - Google Sites\Portfolio
- You need a web-based TG2O1 Portfolio - Create your own
- Your semesters work will be collected and displayed using this e portfolio
- Creating a New Site (follow these steps carefully)
- You need a photo on your site -
- Assignment1-1-*Google Portfolios
- Check your SHARE settings - you need to share your portfolio with Ms. Salvo as an OWNER
- MODIFYING GOOGLE SITE PAGES: Read the notes on Modifying Google-Site Pages and try each of the FIVE techniques: Renaming, Creating, Moving, Deleting and Controlling on your new Portfolio page
- Exercise - setup separate pages on your sidebar under the Navigation tab for . . . Units 1 thru 5 (not under the Units page), see ADDING PAGES to your SIDEBAR for details (note the pages have already been created and are automatically located on the horizontal bar)
Wednesday-
- Intro to Photoshop, user interface and parts of the screen
- We will learn the various parts of the ADOBE PHOTOSHOP SCREEN and the tools used to select parts of an image .
- Assignment#2A-Selection- You will learn how to select parts of an image using the Fruitchef file.
- In order to learn how to select in Photoshop, click here for the instructions.
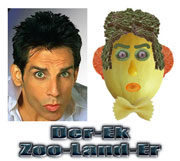
- Assignment#2B-Selection - You will create your own character based on the images part of the Fruitchef file. Here is an example of Zoolander.
Thursday
- Complete Fruit Chef
- Create your own Fruit Chef by selecting a celebrity and combining the images used in Fruit Chef.
* editing and manipulating the Banner will be put on hold for now - please read the following agenda items and use today's class to complete
- Update Site to include Units 1 thru 5 on your Sidebar (for practice), carefully read Controlling and Modifying Google Sites
- if not already done, create the Class LInks page - add it to your Sidebar, as well, add the Links found on the original page to it
- Submit any outstanding URL's for Student Gallery\ePortfolio links
- Read Principles of Website Design followed by Anatomy of a Portfolio
- The link for Adding Photos\Videos to your Site, only add images\photos for now
Friday
- collecting pictures for the Banner
- completing Bad Website Design assignment
- how to collect images using PrtScn or Snipping tool in Windows
- Improving the Look
- Adding Images\Video | Making An Image a Link | Menus and Navigation
- Embedding Video | Embedding Flash
Monday - Customizing your Portfolio
- Assignment #3 Banner - For Portfolio - Ready to return Photoshop? Complete the Banner exercise
- DONE your banner? Try creating an effective "splash page" graphic using your photo\or image of your liking in photoshop - it should be large enough to fill the home page horizontally, without creating any scroll-bar fatigue, what is the optimal size to use?
- TYPOGRAPHY - You may want to fill your image with TEXT. We will later learn how to apply this effect in Photoshop using Layer Masks.
- continue updating your Portfolio layout, move class links from home page to Sidebar page with links
- start editing your Splash page to reflect your style - please keep layout consistent with original template
- review Bad Website Design characteristics - avoid poor user interface
- complete the URL form emailed to your aquinas.me acct - if not already submitted
Tuesday - Customizing Your Portfolio, cont'd - Does your banner fit correct? Click GEAR - >EDIT, SITE, LAYOUT
- Editing and Manipulating the Color, Theme and Layout of your Portfolio
- Manage Site Layout > Themes, Colors and Fonts
- Editing and Manipulating your Portfolio Banner in Photoshop
- how can I match Themes, Colors and Fonts from my Site Portfolio in order to have a seamless Banner
- Linking and UnLinking Layers, Creating New Layers
- Window > Pallets, docking
- Setting Foreground and background Color - The Color Picker
- Using the Gradient Tool
- My SplashPage
- the Do's and Dont's of Website Design
Wednesday - Mass Today (1 hour periods)
- Photoshop and Portfolio cont'd -
- Photoshop; Gradients, how to manipulate_Adobe Support
- importing the Banner into your Google site
- layout of site, Horizontal increase for Banner, matching hex color,
Thursday
- Photoshop_Concepts | pixels | re sizing | colour | saving and file formats
- Read the above resources and prepare any questions you would like clarified, have instance of Photoshop open and navigate\explore any of the concepts notes
- layers | cropping | selections |
- Read and do any exercise and instruction noted in the resource
- have an instance of Photoshop open and navigate\explore the tools and concepts discussed in the resource
- Lesson Three > Layers Assignment
- Photoshop Lesson 03 Layers - * the Flowers2.psd file is not automatically a smart object - once you have placed the file into the Lesson file - right click on that layer and convert to a smart object
FRIDAY- *INTRODUCTION TO PHOTOSHOP - ASSIGNMENT ADDED TO INTRO PAGE
- REVIEW For Quiz_Photoshop Concepts_CYK(1)
- download the following Lesson Folder into your drive_Technical Lessons - these files are necessary for the Learning Photoshop exercises, the videos and practice files are named accordingly - These files are currently located in X:drive
- On the X:drive the files are downloaded 1TGJ2O folder.
- Students Create A Poster For Peace And Justice Using the Following Tools
- Select Image And Separate From Background -
- The Image must be royalty free and a child or teen in need of a coat.
- Background - Filter Render Clouds
- Text
- Use stroke layers effect to outline text
- Here is a sample image.
- *now is a good time for file maintenance - a folder on your student drive labelled Adobe Photoshop - should contain the technical lessons folder and a Works in Progress folder, followed by a completed works folder labelled Photoshop Hand In
Monday
- use today to update your Portfolio, have your banner inserted and manipulate the Layout and shared with Ms. Salvo
- review the Photoshop concepts
- read Thursdays agenda outline - continue to familiarize yourself with the Photoshop interface and tools
- Continuing with our Introduction to Photoshop > Learning Photoshop
- reviewing the Unit Collages and the Activities and Assignments page
- Portfolio - Unit One - Have I updated all my images and uploaded them to my folder? Have I labelled them
- BANNER - Have I followed the recommendations for banner template? Let's look at Vanessa's Banner
- SELECT - FRUIT CHEF
- SELECT - MY FRUIT_CHEF CHARACTER
- LAYERS - HAWAII Postcard -
- LAYERS 2 - Peace Justice Poster - Need to add dates to our poster -
- TYPOGRAPHY - USE A PHOTO I HAVE TAKEN, FILL IT WITH TEXT
- TYPOGRAPHY 2 - CLIPPING MASK- WATCH VIDEO - Create a sign
- Clipping Mask Sign ... Design your own.
- continue updating your portfolio.
Wednesday
- Quiz-Intro Photoshop_Friday
- the Quiz will cover Photoshop tools and the interface
- Lesson 04 Mask Basics and Vignettes
- again the functionality of CS6 differs from CS4 - the extension of the Refine Edge tool in CS6 can be compensated in CS4 by using the following destructive tools Background erase tool or magic wand tool, pay close attention to the options bar in order to improve selection
- Silhouette pictures today - for Unit assignment
- reminder to collect images consistent with assignment - reflection of you
- Take An Image Of Yourself (focal point)
- Find Images that represent you
- Follow the Silhouette process
- All portfolios have been uploaded to our classroom Weebly.
- We are working on completing our silhouette that reflects us and uploading to our website.
Monday
- Self Portrait Collage
- completed and uploaded to website
- Rubric
- If you need assistance with the mask and how to's - check the technical lesson videos on creating masks
- Lesson 4A_Mask Basics and Vignettes
- Lesson 4B_Using Refine Edge (instead use Background eraser tool and set the sampling to once)
- Lesson 4C_Layer Mask Blend
- make sure your canvass size is set to 8 by 10
- Begin composing a Science Fiction Book cover using layer masks, filter and shadows.
- Here is an example of how to create a RETRO Science Fiction Book Cover.
- Reminder Quiz on Photoshop Tomorrow (M/C) on computer
- Review samples of the Collage
- Review rubric for Collage
TUESDAY Science Fiction Book Cover
Quiz Review (File Formats, Photoshop Tools, Resolution, Masks)
Work on Science Fiction Book Cover
- Add 2-3 layer mask
***Remember when adding layer mask to put a gradient to combine layers
- Add Shadow to make your focal point more interesting ->Filter->Blur->Gaussian Blur
- Use Filters to make an interesting background -> Filter->Render->Lens Flare
- Use Perspective <CTRL><T> to make an interesting transformation or slant on the text
Wednesday
Good luck on the Quiz today
- Lesson 4A_Mask Basics and Vignettes (Create your own vignette with an image taken by you)
- Lesson 4B_Using Refine Edge (Extract close-up of yourself from a background using Refine Edges)
- Lesson 4C_Layer Mask Blend (Use close-up , layer mask, Hue Saturation And Brightness can Contrast to paint on your face)
Thursday
Continue updating your portfolio
Movie Poster Rubric
(Use your own original images)
Tuesday
- Included in your Assignment_Portrait Collage - you will need two additional portrait style composite Photoshop images. You can choose from a list of Portrait style tutorials found in the Adobe Photoshop section on this site. Select two tutorials and prepare your final piece by shooting the required head shot style, collect any resources you need - read\watch the entire tutorial first, make any substitutions necessary.
- create your image using a portrait style traditional 8.5" X 11" or 11" X 14"" layout with 300dpi
- Text Mask - A Quote On Your fACE
- Face Paint - Logo On Your Face
any completed pieces from Unit ONE_Collages need to be added to your Portfolio
- take careful consideration of the following - layout, thumbnails, presentation, consistency
- export completed pieces properly - see the Google Sites page for assistance
- read the following rubrics thoroughly_Banner and Portfolio, Photoshop assessment, Silhouette Collage
Thursday
- completing the additional Portrait pieces in Photoshop and updating your Portfolio
Tuesday
You will be using the following coyote image and colorize it through the Painting tools in Photoshop.
Painting coyote using the following tools:
airbrush
wet edges
gradient - circular (sun) linear for foreground/background (draw horizon line)
brushes - two different types of brushes - Window, Show brushes to create the prickly thorns on the cactus
colour swatches - select window show swatches
Here is the finished coyote painting.
Wednesday
Complete Coyote painting and upload it to portfolio. Each part of the painting must be on a separate layer.
Thursday
Updating and uploading images to portfolio.
Plan Movie Poster - Culminating for Photoshop
Please see below for examples.
Friday
Photo-retouching (gondola image of Venice)
Plan your Movie Poster for the final culminating task of Photoshop.
Next week start FLASH ANIMATION
Monday - Continue working on Movie Poster. The Movie poster will be uploaded to Unit 1 Website on Wednesday.
Tuesday - Drawing BATS using the PEN TOOL
You will need the following batmanlogo template to learn how to draw a bats using the pen tool
1. Click on the following tutorial that will show you how to draw a bat in Photoshop.
2. Upload your bat logo to your UNIT ONE, label it PEN TOOL.
3. Continue working on your Movie Poster for Unit One Culminating.
4. Quiz on Photoshop tools, Filter, Layer Masks on Friday.
Wednesday- START UNIT 2 - ANIMATION using ADOBE FLASH CS 4
Each day we will be learning a few skills in FLASH to transfer the skills learn in UNIT 1 - GRAPHIC DESIGN to WEB DESIGN
Unit Two - DAY 1 Animation - Introduction to Flash
Monday - create a Halloween Scene using the following tutorial -
Before you begin - SELECT WINDOW, ANIMATION to change the FLASH SCREEN PRESET
1. Layer1 - SKY- Using the PRIMITIVE RECTANGLE TOOL, and GRADIENT FILL COLOUR create A SKY layer to fill the stage
- CREATE A CUSTOM COLOUR FOR YOUR GRADIENT
- USE THE TRANSFORM GRADIENT TOOL to make the gradient lighter at the top - WINDOW COLOUR - SELECT AMBER
2. Layer2 -MOON - USING THE PRIMITIVE OVAL TOOL AND HOLDING SHIFT CREATE A WHITE MOON
- PRESS F8 to convert the MOON to a MOVIE symbol
3. Layer3 - MOUNTAINS - using the pen tool, draw mountains and fill them in a dark colour
4. Press CTRL ENTER to view your scene in a browser - Call Ms. Salvo to view your scene
Flash - Halloween Scene
5. Layer5 - Create a bat layer. Draw the wing using the pen tool. Fill the wing with solid black colour.
Thursday
Creating A Halloween Scene in Adobe Illustrator
Friday
Upload MOVIE poster to Unit One portfolio.
----------------------------------------------------------------------------------------------------------------------------------------------------
Unit Description
Students will develop graphic design skills using computer design software. Students will be introduced to the elements and principles of design and become familiar with what makes a good composition.
Students will....
Begin to demonstrate an understanding of the core concepts, techniques, and skills required to produce graphic arts; apply project management techniques to the planning and development of communications media products; apply a design process or other problem-solving processes to meet a range of challenges in communications technology; create products or productions that demonstrate competence in the application of creative and technical skills.
Theory
Elements And Principles Of Design
4 Basic Principles Of Design
PHOTOSHOP EFFECTS
SUMMATIVE MOVIE POSTER ASSIGNMENT
balance
contrast
dominance
gradation
harmony
repetition
unity
To read more about the principles and elements of design, visit
http://designelementsandprinciples.com/contrast2.htm
Assessment: Movie Poster Rubric

_files/balance.jpg)
_files/contrast.jpg)
_files/dominance.jpg)
_files/gradation.jpg)
_files/harmony.jpg)
_files/repetition.jpg)
_files/unity.jpg)